
CO₂ Laser Tube Dust Protection Tube Installation Guide
When CO₂ laser tubes (hereinafter referred to as "laser tubes") are used to process materials such as PVC, composite boards, MDF, plywood, and leather, large amounts of smoke and dust may be generated. These contaminants can easily accumulate on the laser tube output window, affecting laser output power and beam quality.
Frequent cleaning of the output window may also cause scratches or damage to its optical coating. Therefore, when using laser tubes in environments with heavy smoke and dust, customers are advised to install a dust protection tube. This helps reduce the rate of contamination and minimize the frequency of output window cleaning.
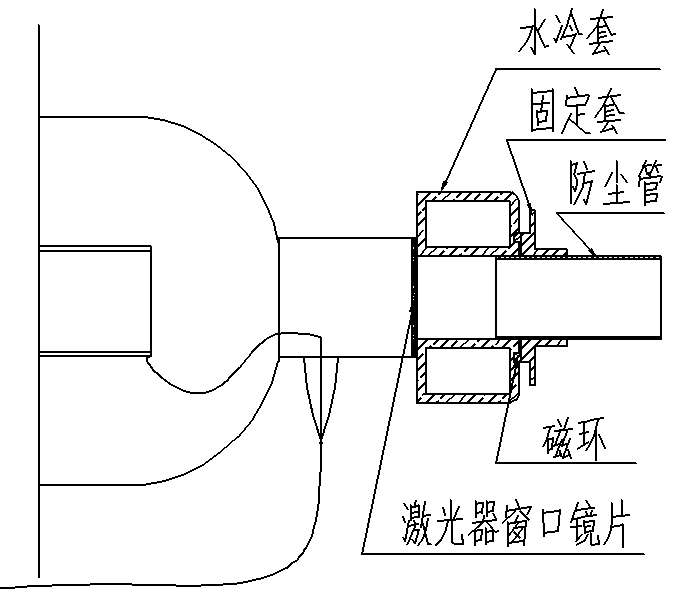
1. Installation Diagram
2. Installation Steps
Step 1: Install the Dust Protection Tube into the Holder
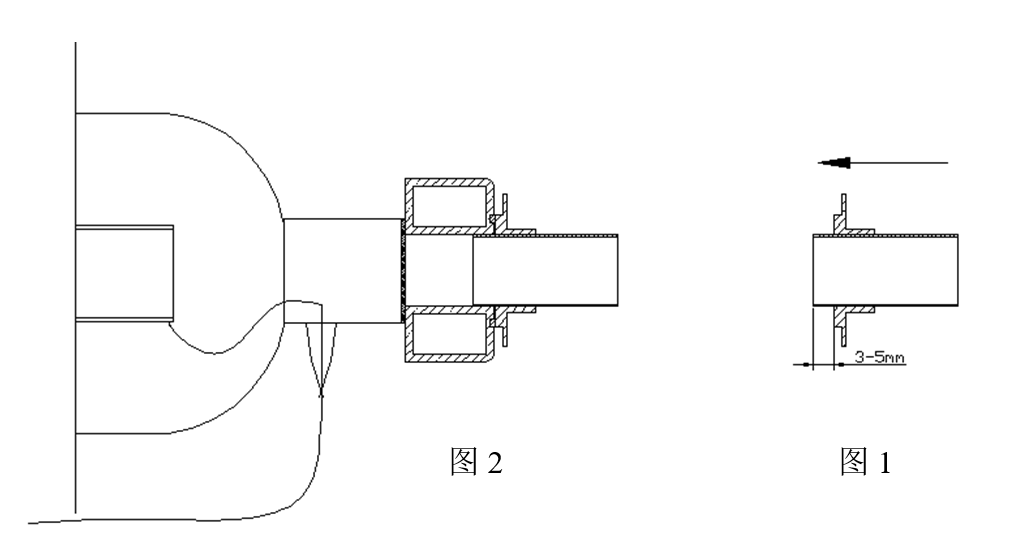
Insert the dust protection tube into the holder, ensuring that it extends 3–5 mm beyond the bottom of the holder, as shown in Figure 1.
The dust protection tube is pre-installed before shipment. Our standard configuration includes a 30 mm dust protection tube. Optional 50 mm and 100 mm versions are also available.
Step 2: Attach the Dust Protection Assembly
Install the dust protection assembly onto the water-cooling jacket at the laser output end of the CO₂ laser tube, as shown in Figure 2.
A magnetic ring is installed at the front of the water-cooling jacket, allowing the dust protection assembly to attach automatically by magnetic force.
Step 3: Check the Installation
After installation, make sure the dust protection tube is securely positioned, without looseness or obstruction of the laser beam. The laser tube can then be used normally.
Step 4: Clean the Output Window When Necessary
If the laser tube output window becomes contaminated, first remove the dust protection assembly.
Use a bamboo cotton swab moistened with absolute ethanol (anhydrous alcohol) to gently clean the output window. Wait until the alcohol has completely evaporated before reinstalling the dust protection assembly and resuming operation.